Do you have a fantastic product idea but you are concerned about investing thousands in tooling before you know that the idea will become a product? You aren’t alone in this fear. Many startups and research & development teams skip prototyping their designs before jumping into producing tooling — resulting in unwanted defects that could be discovered early on. The benefit of enclosure rapid prototyping is that it allows designers to hold, test and validate their designs prior to spending on costly injection molding tooling. At IDIS India, we have seen too many engineers skip this critical part of the process. However, the smart engineers are those who prototype first to iterate quickly, and then go into production after having tested that their product will function properly in the real world.
Why Every Enclosure Needs a Prototype Phase
Your 3D model may appear ideal on a computer-generated image; however it is not necessarily indicative of real-world use of your electronic device, proper placement of buttons for easy use, or the ability to withstand impact from being dropped. Using only CAD software is not sufficient to answer these questions accurately. Rapid prototyping aids in identifying problems early, at an economical cost. For example: A design modification during the rapid prototyping process may entail a few hundred dollars in expense versus thousands of dollars after tooling has been completed. The following problems are commonly discovered by our I-closure team during prototype testing: internal component fitment issues; structural deficiencies due to wall thickness; impossibilities caused by the assembly sequence; an inability to deliver IP rated performance as required; and deficient thermal management practices. Each prototype iteration advances you towards a production-ready design. Rapid prototyping utilizing current technology can provide you with a physical prototype component from your initial concept design within days.
3D Printing Methods for Enclosure Prototypes
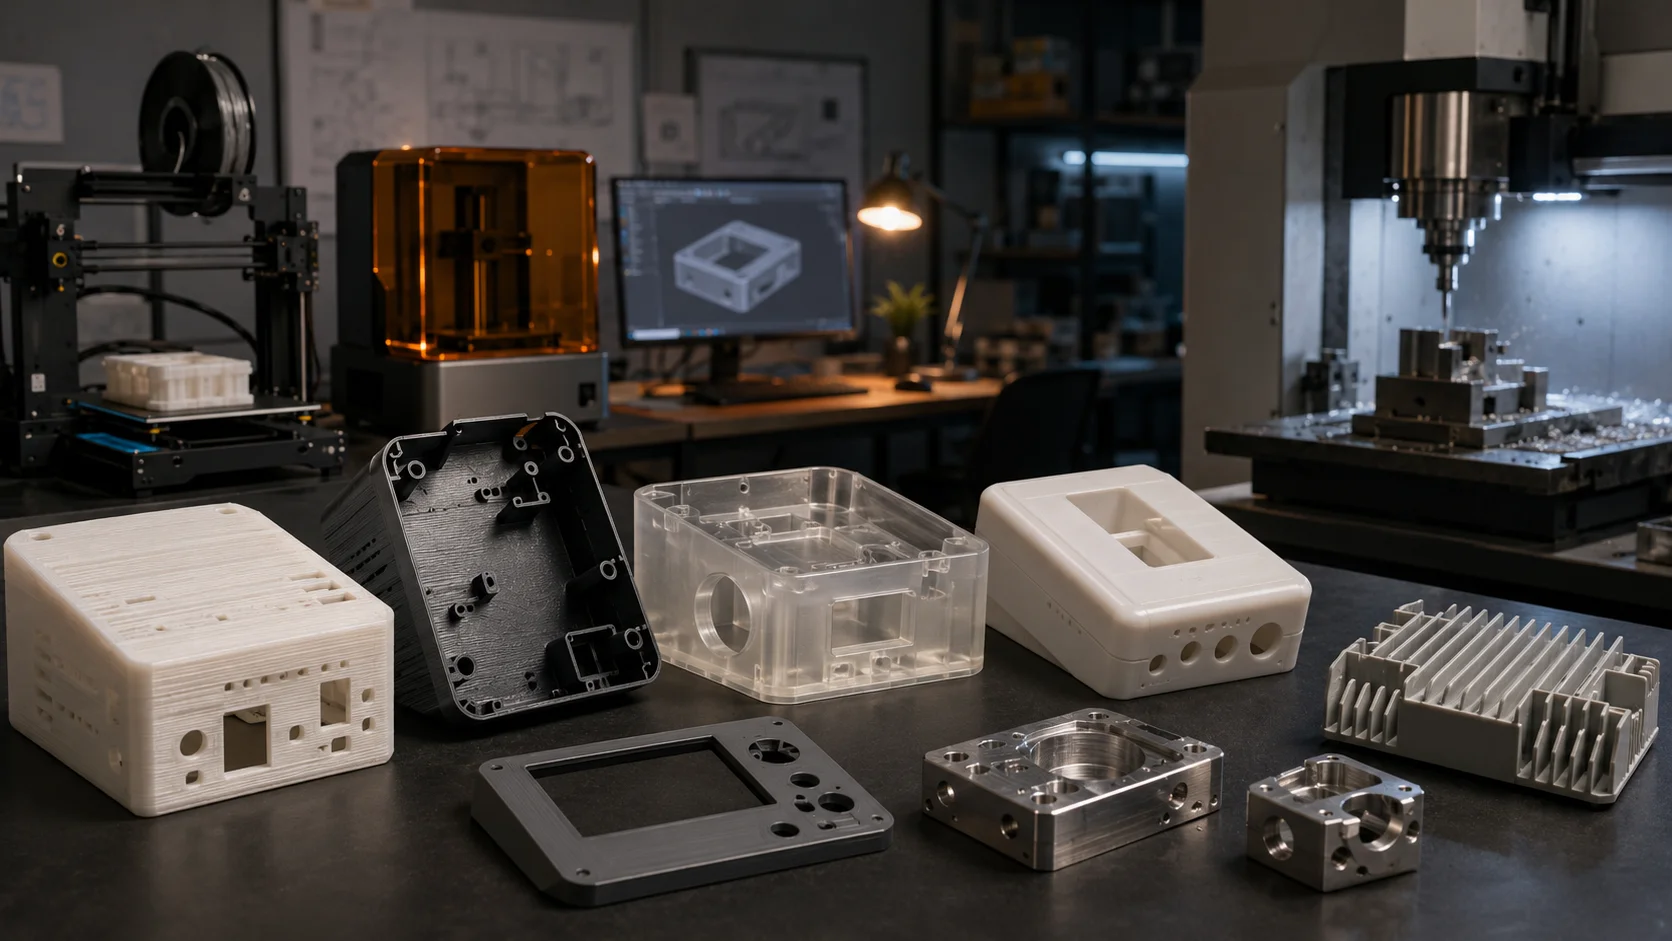
Each type of 3D printing technology will suit different types of applications. Your decision on which to use will depend upon what kind of things you need to test and validate.
FDM (Fused Deposition Modeling)
3D Printing by using the Fused Deposition Modeling (FDM) technology is the best option for your prototype enclosure. Affordable and easily accessible to most people, FDM is a good solution for most validation requirements. This technology works best for: Testing the basic shape of your enclosure Obtaining an approximate size of your future product Testing multiple designs Developing a prototype of your product with a limited budget
The weakness of FDM is that it can create visible layer lines on the surface of your prototype and provides a limited selection of materials for printing. However, you can use FDM to demonstrate the viability of your basic idea!
SLA (Stereolithography)
Surface quality is critical; therefore, you should choose SLA methods (stereolithography). The result will be a superior quality part with a finish much closer to that of an injected molded part than by any other method. The following are some examples of where SLA has been the best: visible surfaces (e.g., consumer electronics) requiring a high-quality surface finish, housing for medical devices requiring a smooth surface finish, prototypes for investors to review, and testing parts with tight tolerances. While there are tradeoffs between higher costs and space limitations, if you need an attention-grabbing prototype for validation, you will get what you need from an SLA part.
SLS (Selective Laser Sintering)
SLS connects Prototype and Small Batch Production. Parts are produced within a powder bed and do not require additional support structures after printing, making the technology excellent for: Complex geometries containing internal channels Functional prototypes that require durability Multiple Printed Parts at Once Testing Snap-Fit Assemblies Because SLS Nylon has material characteristics that are very close to that of Production Plastics, you can use your SLS nylon prototype to acquire realistic performance measurements.
Vacuum Casting for Production-Like Prototypes
At times, 3D printing can’t provide the prototypes you need to see how they will perform as production parts. When this is the case, vacuum casting can help. Vacuum casting involves creating silicone molds from a master pattern (often made using 3D printing) to replicate the prototype part material with manufacturing processes that are used to produce finished parts. Vacuum casting works best when: You need the prototypes to have material properties that match what the actual production version will be; You need multiple versions of the prototypes for testing; The surface finish of the prototypes must meet specified requirements; and Finally, you are required by testing of the prototypes to undergo durability testing. Although vacuum casting usually takes longer than 3D printing to produce your prototypes, when completed, the prototypes will be an accurate representation of what the final injection-moulded part will look like.
CNC Machining for Metal and High-Performance Plastics
Additive manufacturing does not meet the requirements of every application, so consider CNC machining for applications requiring high volume and tight tolerances. CNC machining allows the creation of designs with the highest range of engineering plastic and metal materials available, e.g., EMI shielding (aluminium or steel), extreme temperature resistance, chemical compatibility with a specific chip or other factors and dimensional tolerance required. The negative aspect is that entire tooling and lead time will be much greater than with additive manufacturing technology, but the capabilities of CNC technology for specialised applications are unequalled through other processes.
Material Selection Strategy for Prototype Validation
Ideally, you’ll want your prototype to be as close as possible to what will be produced. However, it may not always be affordable to create a prototype that perfectly matches production requirements. For example, if your prototype is an enclosure for an IoT device, you can use standard ABS-like 3D printing materials for validation purposes. The goal of a prototype is to validate form, fit and basic function.
Devices used in the medical industry will require additional considerations. If biocompatibility is going to be an important consideration for the production version of your prototype, then the materials used in the prototype should be biocompatible.
On the other hand, when creating consumer electronics, the functions and aesthetics can be equally important; therefore, you might want to consider using SLA resins to accurately simulate the look and feel of production plastics.
At iClosure we favour the following stages of prototyping:
1. Early Prototypes: Focus on fit and basic function of the prototype. Use cost-effective materials. 2. Validation Prototypes: Aim to match and verify critical material property requirements (i.e., strength, temperature, and chemical compatibility). 3. Pre-production Prototypes: Where possible, use the same materials that will be used for production.
Turnaround Time Expectations by Method
Speed varies dramatically between prototyping methods. Understanding these timelines helps you plan validation phases effectively.
| Method | Typical Turnaround | Best Application |
|---|---|---|
| FDM 3D Printing | 1-3 days | Concept validation |
| SLA 3D Printing | 2-5 days | Form and finish testing |
| SLS 3D Printing | 3-7 days | Functional testing |
| Vacuum Casting | 7-14 days | Production validation |
| CNC Machining | 5-10 days | Specialized materials |
These timeframes assume standard sizes and complexity. Large enclosures or intricate geometries may extend timelines.
But heres the key insight: even the longest prototyping method beats injection molding by weeks or months. And the learning you gain prevents costly mistakes down the line.
Smart Budgeting for Prototype Development
There is a large variability of prototyping expense depending upon method, size and complexity. Therefore, consider utilizing good budgeting principles that emphasize value as opposed to price alone. For early-stage prototypes, it’s more important to be quick and inexpensive. For this reason, the most cost advantageous method for validating initial concepts would be through FDM printing. As designs advance and mature, increasingly invest in higher-quality prototypes. Even though SLA or vacuum casting may be more expensive per part, they can catch issues that might be missed with less expensive methods. When calculating total iteration costs, recognize that it’s possible to create 3 FDM prototypes at a lower cost than creating 1 SLA prototype; however, if the SLA prototype identifies a critical design flaw that was missed by the 3 FDM prototypes, that single SLA protoype could save you more than its cost. Therefore, budget around 10-15% of your overall development budget for prototyping purposes. This expense usually will generate savings of at least 2 to 3 times that amount due to avoided tooling modifications and delay.
Real-World Case Study: IoT Environmental Monitor
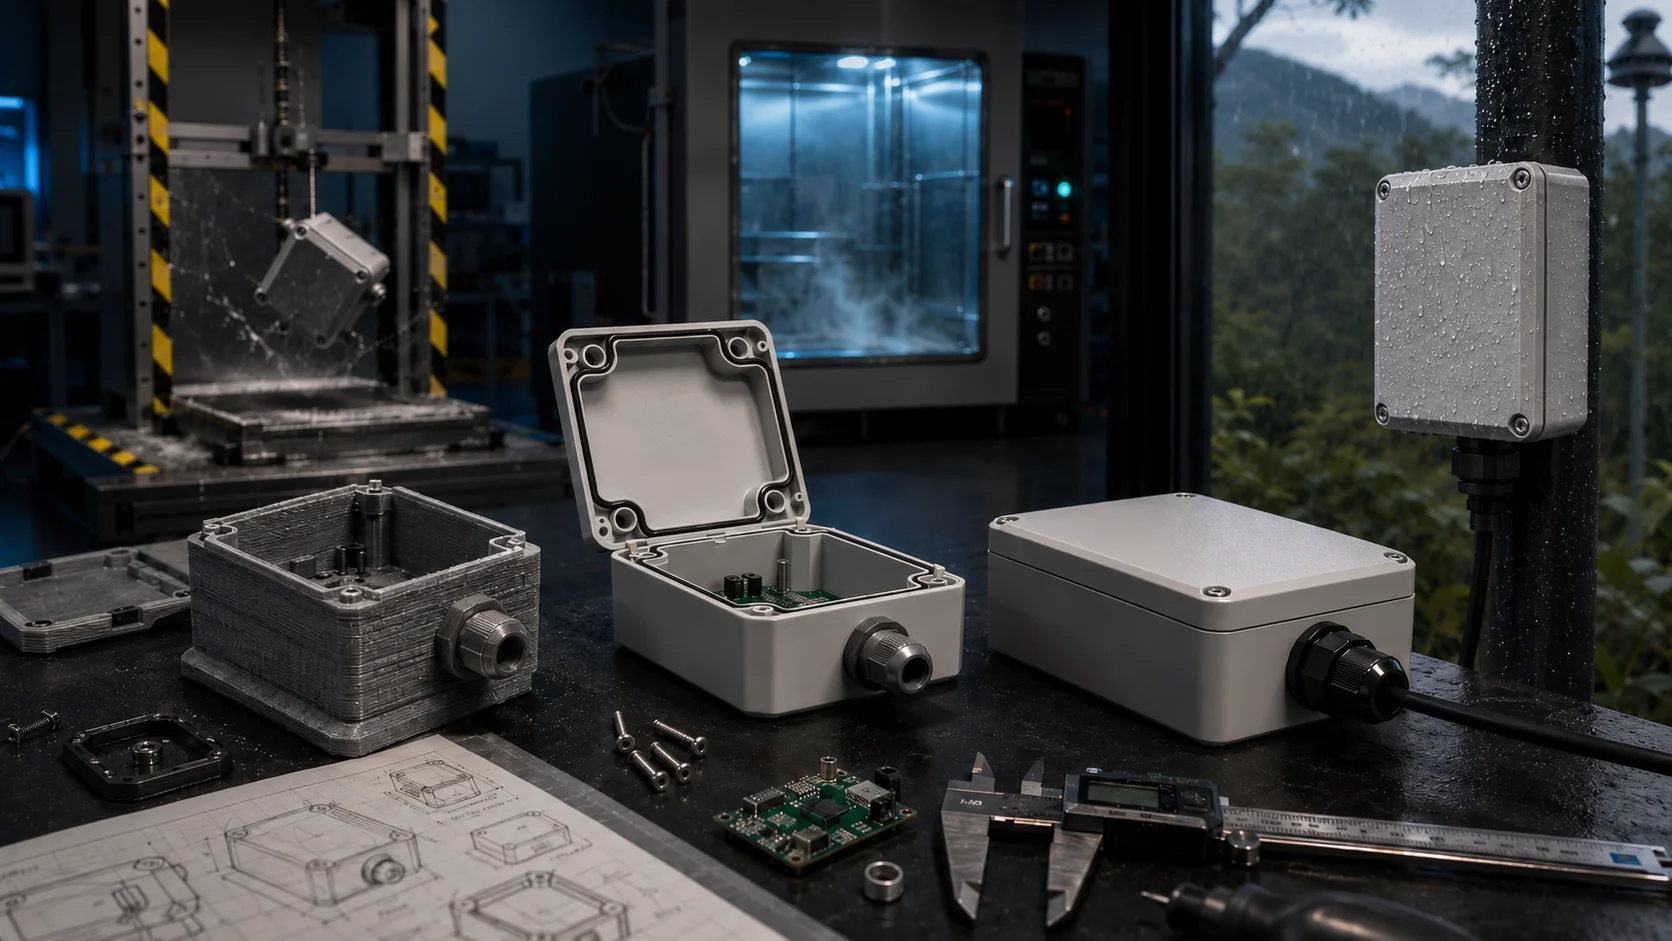
An IoT environmental monitoring device was designed by a new official company. They were looking for an outdoor enclosure with an IP67 certification, and the first mockup was made before any hands-on testing had occurred. We developed basic FDM prototypes to confirm the fit and assembly of their initial prototype in order to identify basic issues related to their design. The first iteration of prototyping found that the mounting system for the PCB was in conflict with the sealing groove on their device, and therefore we were able to add a minor change in the design to eliminate this issue. The next step was producing SLA prototypes so we could begin verification of sealing methods. The smooth surface of the ANSI F1 gasket used on the prototype provided a perfect surface for compression testing. After completion of these initial seal tests, it was found that wall thickness would require modification in order to achieve uniform sealing performances. Finally, production-grade ABS vacuum casted samples were produced for durability testing. When subjected to standard durability tests (drop and thermal cycling), the prototypes passed all tests and allowed for confirmation of the design’s validity for actual use. Total investment for the various methods used in developing prototypes: approximately $2,800. Total tooling cost of original flawed design: $15,000+. The validated prototype moved directly into production tooling without any surprises or changes at considerable expense.
Making the Transition from Prototype to Production
Creating a successful prototype helps ensure a successful transition to production scale through careful planning and documentation of all design changes made during prototype development in production tooling specifications. It is critical to confirm that your prototype materials possess the same physical properties under stress or at extreme temperatures as the final production materials. Running small quantity pilot production runs using production like processes can help identify any problems that may have been overlooked during prototyping. I-closure assists its customers in through their transition from prototype to commercial production. By utilizing our injection molding expertise, we are able to provide detailed information on the prototype and commercial production requirements.
Ready to Start Your Enclosure Prototype Journey?
The concept of rapid prototyping at Enclosure is not only to create product parts quickly, but to also create intelligent choices that maximize time and minimize costs which will ultimately allow for a more successful product development process. All successful products begin with some level of validation, and through establishing the appropriate prototyping strategy, you can complete the validation process. Whether you need to create simple concept models or production-ready prototypes to validate your designs, IDIS India can assist every step of the way. At IDIS we understand both the various rapid prototyping technologies as well as the injection-moulding requirements and therefore, will ensure that your prototypes are ultimately ready for the successful production. Please don’t hesitate to contact our engineering team to discuss your specific needs in regards to prototyping; together we can help you to select the most appropriate prototyping method(s), material(s), and timeline to help validate your design in the most efficient and cost-effective manner. Because the best time to find any issues with the design? Before they become costly to resolve.